

 |
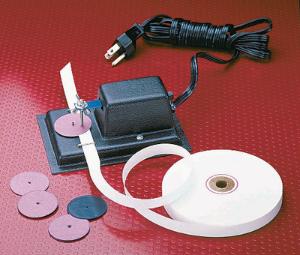
| Tape Timer from Sargent Welsh |
The College Board has released an official lab manual for AP Physics 1 and 2. It's important to understand that, though they call it a teacher's manual for laboratory investigations, the experiments listed are not "required" for the AP exam. Your choice of experiments that you do in class should be based on your interest, available equipment, etc.
The manual might be 348 pages long, but no worries. Just read the 30 pages or so that describe the actual suggested experiments. These are as gold to the AP physics teacher, except more practically useful than gold. I don't suggest you use these good 30 pages exactly as described, but that you use the activities described in these 30 pages as the basis for a couple of ideas in your course.
One of the activities in the book asks students to determine whether a wind-up toy car moves with constant acceleration. What a great question! Acceleration by itself is a difficult enough concept, but then understanding what is meant by "constant" acceleration is tougher still.
However. Were I to ask that open-ended question early in the year, right after finishing the kinematics unit, I'd get such poor lab performance as to make the activity worthless. "Open inquiry," as the College Board calls it, is a waste of time if your students aren't ready for it. An open-ended problem followed by incessant questions about what to do, followed by frustration on your and the students' part and you finally just giving them step-by-step directions, isn't really what's intended by "open inquiry."
Students must be carefully prepared throughout the year for open-ended laboratory exercises. Early on, you need to teach some laboratory skills that they can eventually fall back on when it's time to answer a truly free-form question in lab. For example, using a motion detector to measure distance, instantaneous speed, and acceleration is a skill that students must be taught. Similarly, it's important to get your class practice in using photogates, spring scales, video analysis, ammeters and voltmeters, and other basic equipment. I'm not suggesting one of those beginning of the year "let's measure a bunch of random stuff and talk about error" exercises, I'm suggesting that you teach such skills in context. Do demonstrations with this equipment. Have students use the equipment to verify the answers to homework problems. Do a long-form lab with graph linearization where they must use equipment for multiple-data-point collection.
Want a practical example of the difference between an early-year experiment and a late-year experiment?
Here's the early-year version: I have students release a PASCO cart from rest on an inclined track. They use a tape-timer* to get the position of the cart 60 times per second. Graphing the cart's position every 6th dot** makes a position-time graph with 0.1 s precision.
* You can buy such a timer from PASCO for $180, or you can get the cheap version from Sargent Welsh for $17. The cheap version works fine.
** Why only every 6th dot? Because we can decimalize every 6/60 of a second into 0.1, 0.2, 0.3 s. Trying to graph every 1/60 of a second leads to numerical confusion, the graph taking ten times as long to make, and incorrect accelerations. Thanks to Curtis Phillips for pointing this easy trick out to me after I had struggled with the graphical analysis of this experiment for nigh on two decades.
Next, I have students take the slope of two tangent lines to find two instantaneous speeds. The change in speed divided by the time it took for the speed to change is the cart's acceleration. You can see here the homework assignment that students fill out. I determine the "theoretical acceleration" by measuring the angle of each group's track with an angle indicator, and using gsinθ.
This experiment takes a full 90-minute lab period plus a night's homework assignment to complete.
Then the late-year version: In the last month of the course, I assign the homework problem with a direct measurement video that you can read here. Everyone can view the video, then determine for himself how he's going to check for constant acceleration. No one really, truly remembers the tape timer experiment from October. However, they now have a reasonable understanding of what acceleration is, and they have used multiple methods of finding instantaneous speeds all year.
This assignment provoked such a wonderful in-class discussion. Some folks compared the change in speed over two time intervals. Others used four time intervals. Some made a velocity-time graph for four or eight data points and looked for a straight line. An argument ensued as to what the distance scale on the video was; a student pointed out that it didn't matter, as arbitrary distance units work just fine to answer the question. The one confused student who confused speed and acceleration discovered his mistake quickly and authentically, without me having to say a word.
In other words, at the end of the course, my class not only could perform a complicated, creative experimental task... they had the skills to discuss the merits of different methods. That's the holy grail of introductory physics laboratory work. But, searching for the literal Holy Grail requires a long, difficult journey filled with peril. Don't expect to hold the grail immediately -- guide your class through the journey. Can't I have just a bit more peril?
No comments:
Post a Comment