 |
| Motion graph simulation by Milo Jacobs |
On the very first day of kinematics, I introduce position-time graphs via this come-and-show-me exercise. Each student gets a different position-time graph, and is asked to use position-time graph facts to justify their answer to two questions:
1. Is the cart moving toward or away from the motion detector?
2. Is the cart speeding up, slowing down, or moving with constant speed?
Then, once I approve their predictions, the student heads to the back of the lab where I have carts and tracks. They have to choose to use either a regular pasco cart, or one of them motorized bulldozers. They have to choose how or if to incline the track. They have to choose where to put the sonic motion detector that makes the position-time graph.
Finally, they bring me the graph they made. (I use the detectors that work via bluetooth with the graphical analysis app on a phone; if you're using a labquest or labpro, I just have students take a picture of the graph and show me.) I check that the graph looks correct AND represents at least one second's worth of motion. Then I give the student a different graph to go through the process again.
Once the class gets the idea that they are required to begin each response with a fact written verbatim from the fact sheet, they figure out very quickly how to do these exercises. We can move on to velocity-time facts and exercises very quickly.
But what if you have students who aren't in your lab? How can they do this laboratory exercise from home?
I've got a simulation for you. It's certainly not the same as being in lab! There's a huge difference between clicking buttons on a computer, and actually physically futzing with a track, cart, and motion detector. Yet, a simulation is better than nothing at all, better than saying "okay, imagine the motion..."
There's no shortage of motion graph simulations around. But none of them did what I wanted - I want the ability to use EITHER a motorized cart OR a free-wheeling cart. I want to be able to place the motion detector anywhere I want. I want to be able to tilt the track in any direction. And I want to be able to choose whether to give the cart a quick shove, or to just let the cart go from rest.
This summer my family's computer programming department - that is, my son Milo - was stuck at home with no obligations. I offered him a job programming the exact simulation I was looking for.
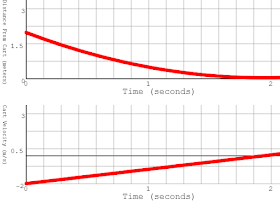
Take a look at Milo's simulation here - a screenshot is at the top of the post. You adjust the track angle, click confirm; click a position for the detector; then click to push, release, or use the motor cart. The simulation shows the cart's motion, and simultaneously shows the position-time and velocity-time graphs develop - exactly as if you were using a labquest in the classroom!
Then there's a link to download the graphs if you want an easy way to get a .png file to submit electronically. Here's what they can look like:
